
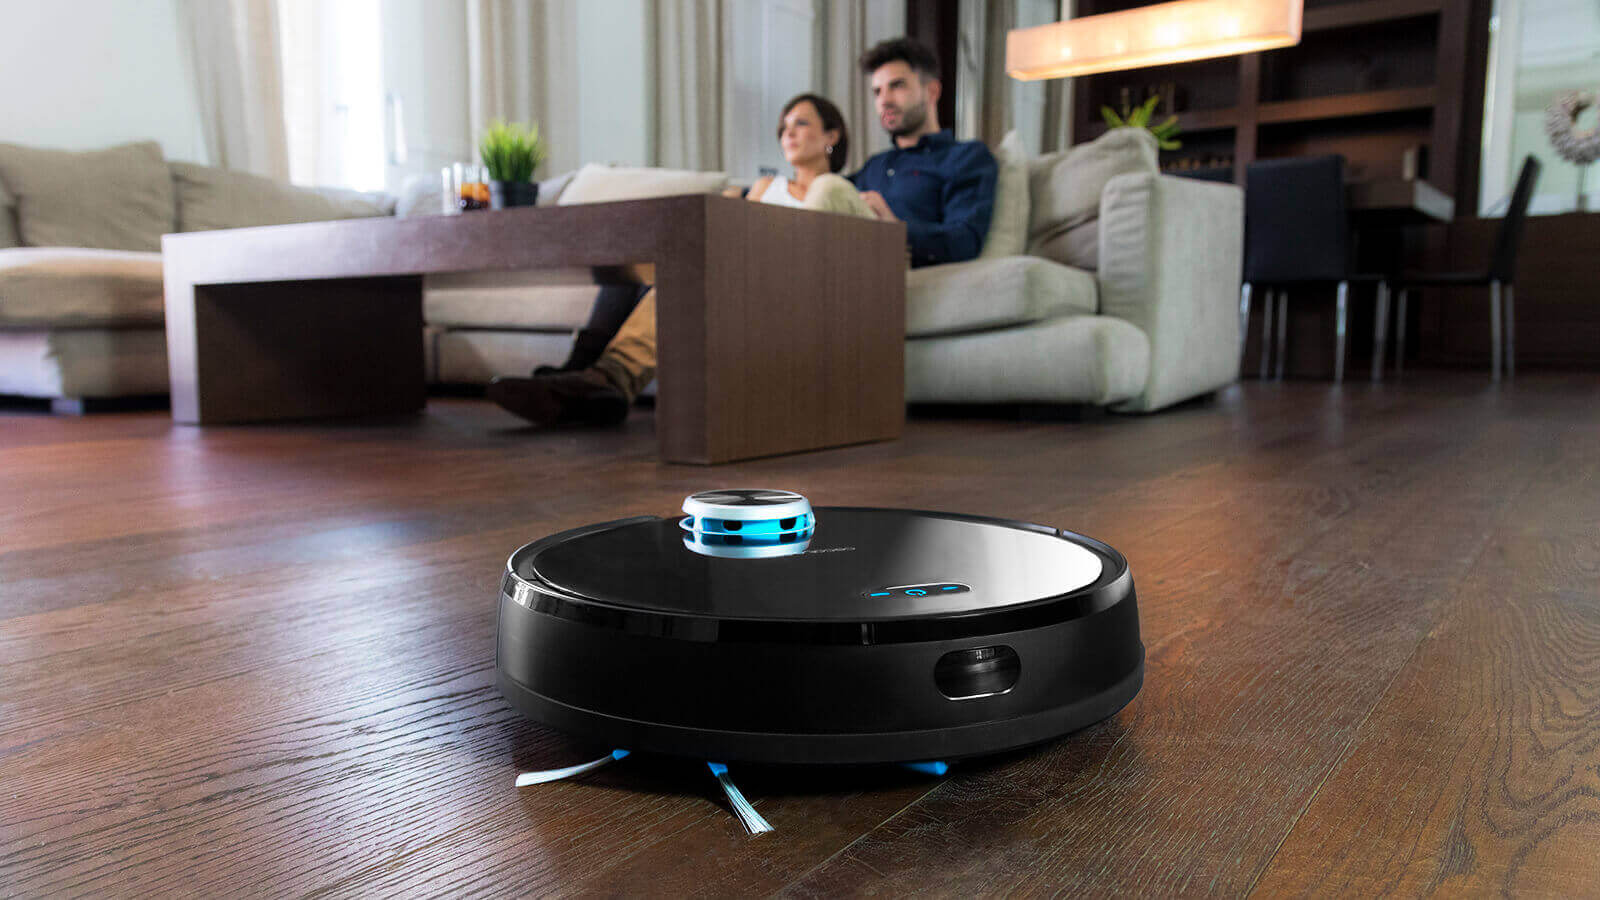
Learn how to care for and extend the life of your robot vacuum.
Whether you have a low-cost model or one of the greatest robot vacuums on the market, you will need to put in some effort to keep them in good working order. They do, indeed, save you a lot of time and energy by doing the cleaning for you. However, they must be cleaned in order to function effectively.
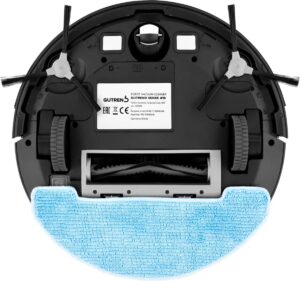
Fortunately, maintaining them is a rather straightforward operation that only needs to be done once a week at most. While we’ll go over how to properly care for your robot vacuum cleaner, keep in mind that not every robot vacuum is the same, and there will be some differences between models, such as the number of side brushes. Most notably, some versions now mop, and you must take an extra step to clear out the mop pad(s).
With that out of the way, let’s get down to work. There isn’t much prep work to be done, and there aren’t many equipment required. It may appear unneeded for a how-to manual. However, it is better to be safe than sorry, especially if you, like me, have a history of missing or skipping steps.
STEPS FOR MAINTAINING YOUR ROBOT VACUUM
- If applicable, look into the app.
- Turn the robot vacuum over.
- Side brushes should be untangled and cleaned.
- Brushroll untangling and cleaning.
- Examine the tires.
- Remove the dustbin.
- Check, clean, or replace the filter.
- Ensure that the charging contacts are clean.
- Clean the robot vacuum.
EQUIPMENT AND REQUIREMENTS
- Scissors.
- Depending on the model, a screwdriver.
- (Optional) towel.
- The sound of running water.
- Cloth or paper towel.
HOW TO CARE FOR YOUR ROBOT VACUUM STEP BY STEP
1.If applicable, look into the app
The majority of contemporary robot vacuums come with an app. Furthermore, most apps connect with the companion device in ways other than asking it to clean and tracking its motions.
Often, you may examine a component’s lifespan and purchase a replacement immediately from the app. This can also help you figure out where the main problem is. Do this first so you know what to expect and if there is a problem you aren’t noticing.
2. Turn the robot vacuum over
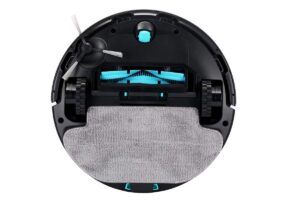
Because the majority of the mucky components are underneath, you’ll have to flip the robot vacuum over onto its back.
While this is optional, we recommend resting it on top of a towel to avoid scratching it or having the unit slip off whatever surface you’re working on. Furthermore, you may easily keep any debris on the towel to dispose of later before tossing it in the laundry.
3. Untangle and thoroughly clean side brushes
Cleaning one or two side brushes is the same procedure. First, take the scissors and trim anything that has become twisted around the brushes, being careful not to catch any of the bristles. You should be able to totally remove any tangled hair or dirt from the brushes.
You’ll need to unscrew the side brushes next, so check to see if you need to. If you do, take the proper one, unscrew the side brushes, and set the screws aside.
Take out the side brushes. Hair and debris frequently get lodged where the side brush plugs into the unit, so clean the underside of the side brushes.
Replace the side brushes.
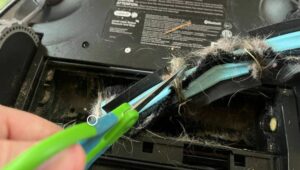
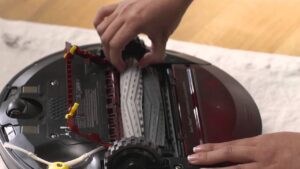
4.Untangle and clean the brushroll.
A brushroll cover is frequently used to keep the brushroll in place. To begin, you must first open or remove the lid. Though each robot vacuum is unique, this will be fastened by a lever, eliminating the need for a screwdriver.
Pull out the brushroll entirely after the cover is out of the way. Hair will most likely be spooled around it. Cut through any tangles using the scissors, being careful not to cut any of the brushroll’s bristles or fins. Examine both ends of the brushroll. There may be buildup where it links to the robot vacuum, as with the side brushes.
Remove any accumulation from both ends of the brushroll, then replace it and cover it.
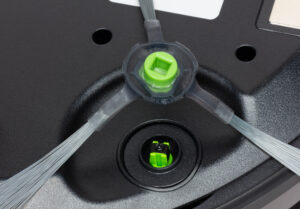
5. Inspect the wheels
Debris, such brushes, can accumulate around the wheel axles. Because the wheels are usually not easily removed, you must carefully cut away trash with scissors.
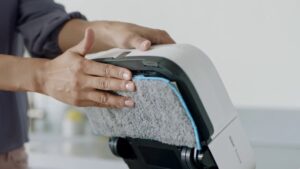
6.Remove the dustbin
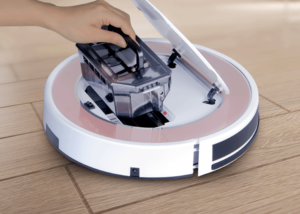
Ideally, the dustbin should be emptied after each use of your robot vacuum. It’s a good idea to detach it from the robot vacuum and empty it during routine maintenance.
Though not all robot vacuums are the same, the dustbin is usually located on the unit’s back side. As a result, you must first flip the robot vacuum upright. Then take out the trash. Open it and dispose of the contents in the garbage. Proceed to the following step before reinstalling it.
7. Inspect and clean or replace the filter
The filter is frequently linked to the trash can. Remove the filter and run it under water to wash away any build-up, unless your instruction says otherwise. You’ll also want to replace them on a regular basis, so acquire one extra for future replacement. Every organization has its own set of rules, but iRobot recommends replacing the filter every two months.
Replace (or replace) the filter in the dustbin. Replace the dustbin in the robot vacuum.
8. Maintain clean charging contacts
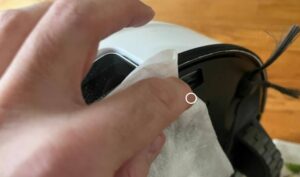
If the charging contacts on the robot vacuum and the charging base become unclean, they will be unable to transfer electricity and, as a result, will not be able to charge the robot vacuum. Wipe them clean with a damp paper towel or cloth, then a dry one to ensure all moisture is removed.
9. Clean the robot vacuum
Wipe clean the robot with a moist paper towel or cloth, paying special attention to any sensor windows, to ensure proper navigation. You can now return the robot vacuum to its charging station and resume normal use.
FAQS
How frequently should a robot vacuum be emptied?
The trash of your robot vacuum should be emptied after each cleaning session, especially if you have pets or messy children. The calculus alters if you have one with a self-emptying base station. The base station sucks out the contents of the dustbin and deposits them into a bag that only needs to be replaced every 30 to 60 days (see your manual for specifics).
How can I extend the life of my robot vacuum?
The easiest method to extend the life of your robot vacuum is to follow the steps outlined above so that no debris accidently breaks any equipment. Also, if your robot vacuum is a little older, make sure to get replacement components as soon as possible and maybe grab an extra because you never know how long a firm will maintain their product.
FINAL CONSIDERATIONS
Taking care of your robot vacuum is normally simple, but it is required. It, like any piece of equipment, can make our lives easier, but only if it is in good working order. If you inspect your robot vacuum once per week or two, you’ll know it’s working properly.
If you know one of your pets has been shedding excessively or if your robot vacuum isn’t cleaning as well as it should, don’t wait for your regularly scheduled cleaning. A tangled side brush is all it takes to keep it from picking up what it should. Additionally, a clogged filter or a full trash can might cause backup.
In any case, cleaning a robot vacuum takes less time than vacuuming everything by hand.


