
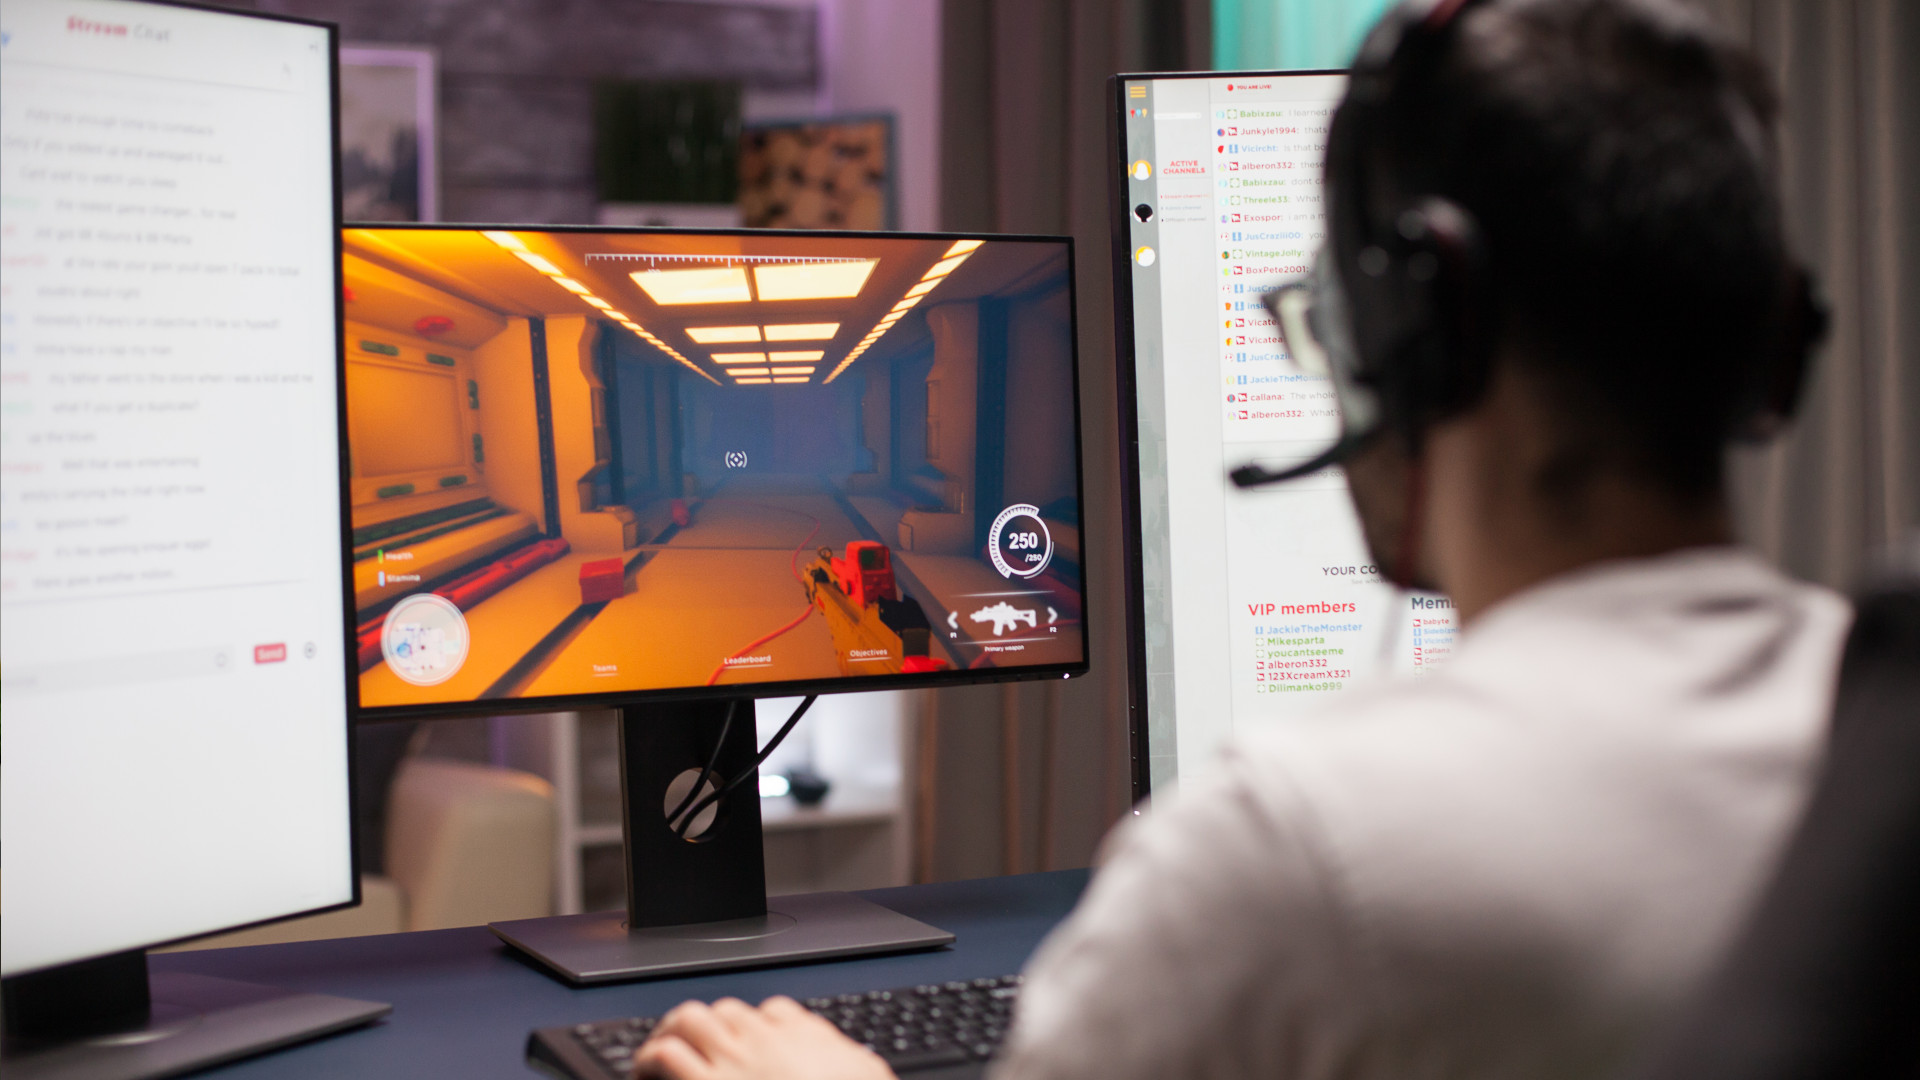
Getting your hands on the best gaming monitor is only the first step toward having the best gaming experience possible. There are numerous aspects to consider when maximizing not only the monitor itself, but also the best gaming PC to which it is connected, as well as the output cable you are using to link them.
As you learn more about these topics, it becomes evident that you need to expand your knowledge of how gaming monitors function, the many settings that work best with your gaming setup, the proper connectivity, and so on.
We’ve compiled the best tips and tricks for optimizing your gaming monitor for peak performance, whether you have the best 4K monitor with the most recent specs, the best curved monitor that squeezes the most resolution into a smaller space, or the best cheap gaming monitor deals that won’t break the bank. If you follow our recommendations, you can be confident that you will have the finest gaming monitor and gaming experience possible.
Steps for Setting Up a Gaming Monitor
- Check your connections.
- Connect the connection to your graphics card.
- Set the resolution and refresh rate.
- Enable any variable. Refresh Rate (VRR) Technology
- Adjust the color parameters.
TOOLS AND REQUIREMENTS
- To connect a gaming monitor.
- A gaming PC.
- Use an HDMI or DisplayPort connection.
Step-by-Step Guide
1.Check your connections
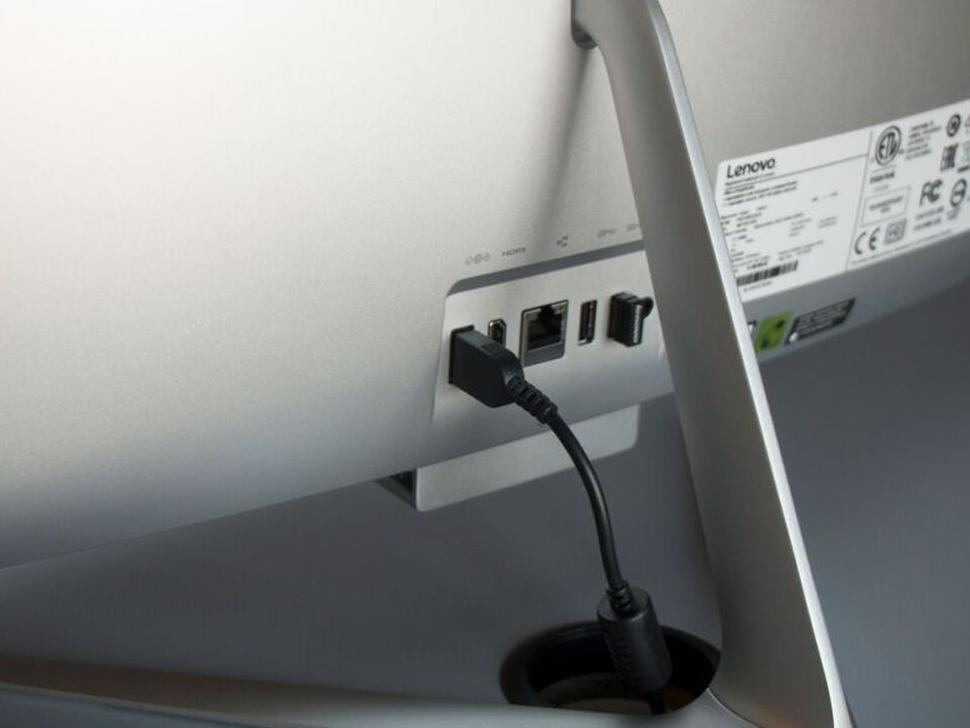
Before you do anything else, be sure you have the right type of cable. If you have a 4K resolution gaming monitor, for example, an HDMI 1.2 port on an outdated PC or a non-4K cable would not suffice. Either will work, but you will not be making full use of the monitor.
It’s critical to check that both the PC port and cable match the type of monitor you have; if you don’t intend to upgrade your PC to the latest specs, it’s a better idea to buy a more budget-friendly monitor instead, otherwise you’ll end up squandering money. But if you do, make sure everything matches.
HMDI or DisplayPort? The former is commonly used for a variety of devices and will most likely be accessible for the monitor you purchase. DisplayPort has a higher bandwidth, more spec possibilities, and is primarily built for monitors, so use it if your game monitor supports it.
2.Connect your cord to your graphics card
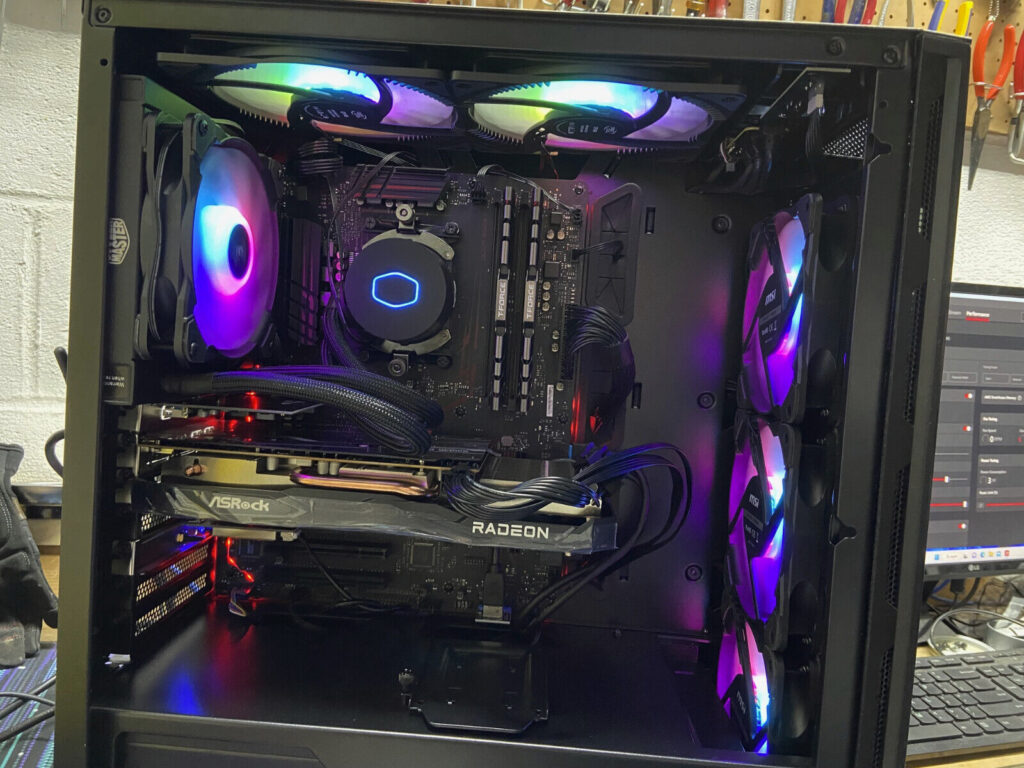
It is critical that your HDMI or DisplayPort cable connects to your graphics card slot rather than your PC’s motherboard slot. Choosing the latter over the former results in lower performance because frames are rendered using your processor’s integrated graphics rather than your separate graphics card.
To ensure that it is the correct slot, check for a horizontal slot – generally but not always – toward the bottom of your PC’s chassis that connects directly to the card. The motherboard slot is the vertical slot at the top. Only use this port if you do not have a graphics card.
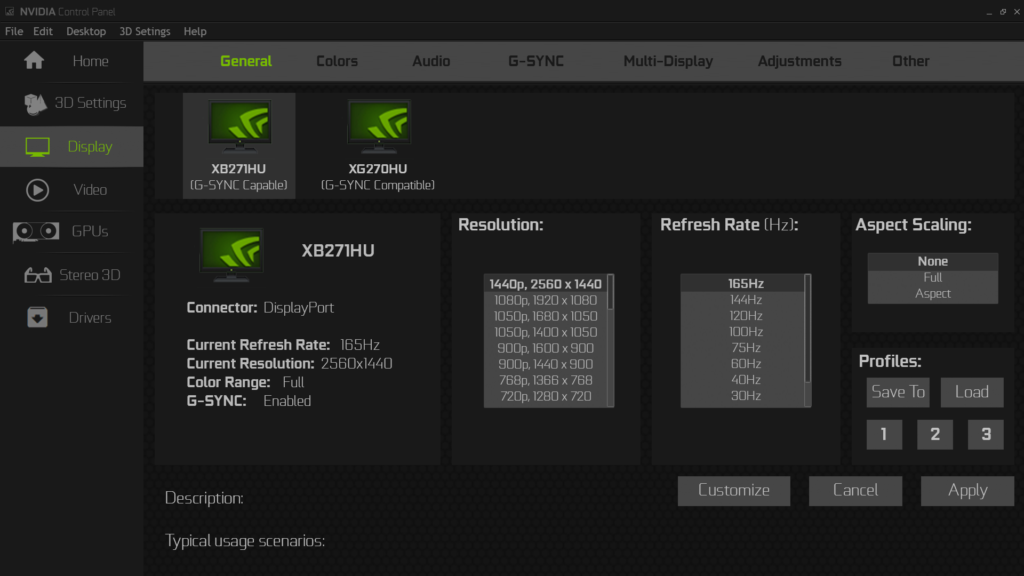
3.Set the resolution and refresh rate
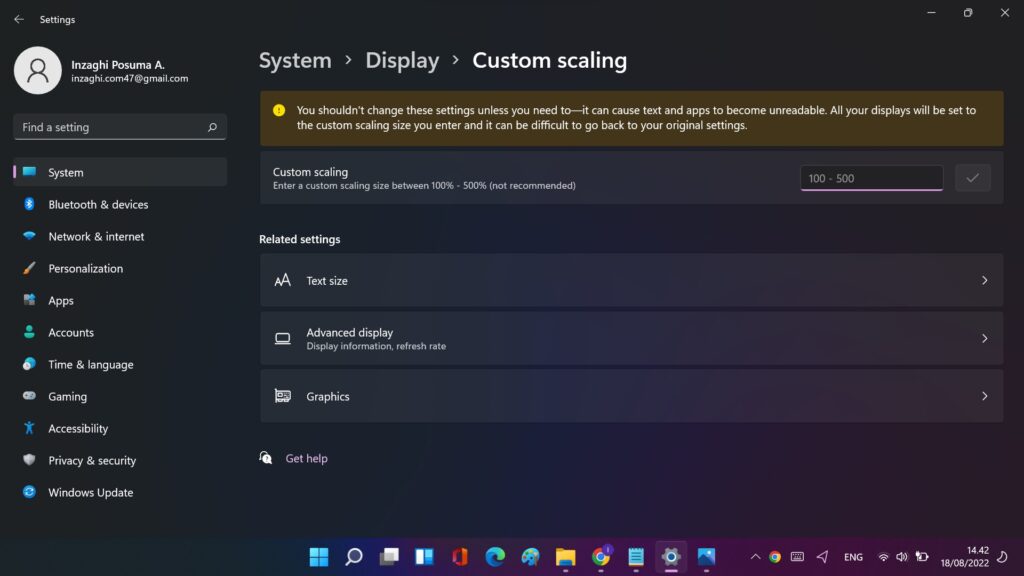
Now that your monitor’s hardware has been configured, you must set the resolution and refresh rate to ensure that you get the most out of your gaming experience. To change the resolution in Windows 11, right-click on the desktop and select Display Settings, then scroll to Scale and Layout, open Display resolution, and select your monitor’s native settings.
On the same menu, select Advanced Display Settings and then Refresh Rate. Choose the maximum refers rate.
4.Turn on any variable refresh rate (VRR) technology
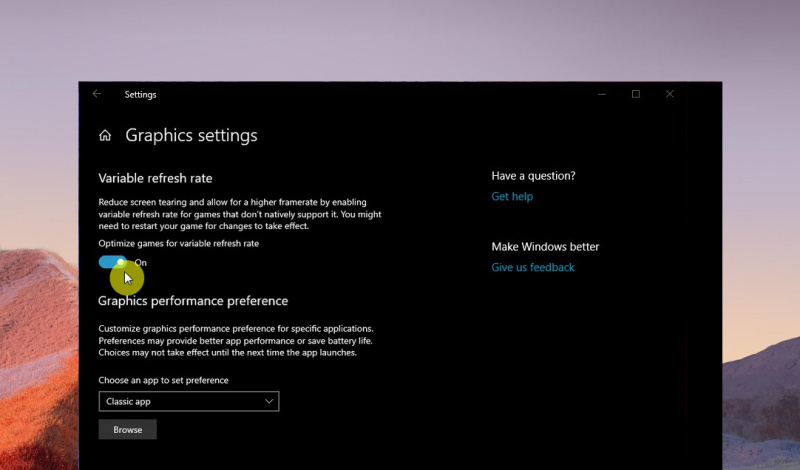
Some gaming monitors include VRR technology, such as Nvidia G-Sync or AMD FreeSync, which adjusts the refresh rate of your display to match that of your graphics card.
To enable G-Sync manually on Windows 11, right-click the desktop and select Show more options. Nvidia Control Panel > Display > Set up G-Sync > Enable G-Sync and G-Sync Compatible > Select Your Display > Enable Settings.
To enable FreeSync manually on Windows 11, right-click the desktop and select Show more options. AMD Radeon Software > Display > Enable FreeSync.
5.Adjust the color parameters
After you’ve enabled VRR technology, you need also enable HDR and color bit depth. On Windows 11, it’s as simple as pressing Windows Key + Alt + B. You may also enable it by right-clicking on your desktop, selecting Display Settings, selecting your display, and checking the Use HDR box. Make sure you enable HDR in both the monitor and game settings; else, it will not work.
Color Depth can be enabled in two ways, depending on whether the machine is powered by Nvidia or AMD. For Nvidia, right-click on the desktop and select Nvidia Control Panel > Display > Change resolution > Choose your display > under Apply the following changes Choose Use NVIDIA color settings > Select the highest color setting.
For AMD, right-click on the desktop, then pick AMD Radeon Software > monitor > select your monitor, then Color Depth from the drop-down menu, and finally the highest color option.
Final Thoughts
There are a few extra considerations when setting up a gaming display. For example, some displays include a slew of additional options. For example, some displays allow users to modify settings using a keyboard and mouse rather than just hardware buttons.
There is also an aim stabilizer, which corrects and displays motion blurring. This is a crucial feature for individuals who enjoy first-person shooters, as actions such as gun recoil, running, and taking damage generate motion blur. The black equalizer separates the screen into portions, which are then equalized to allow for clear viewing of dark areas. GameAssist allows you to generate custom crosshairs, which is useful for shooting games that do not have them.
Finally, an increasing number of monitors include eye care features that help prevent eye strain while playing or using your monitor for extended periods of time. When looking for the finest gaming monitor, consider what features each one offers and which ones will best meet your needs.


